Making Coloring Images Ren’Py
One fun idea I was pondering about and thinking would be cool to try doing in Ren’Py was to allow the player to color images, like a coloring book or page. I knew this could potentially be quite challenging but realised, you probably can simplify it enough for it to be a plausible thing to do within Ren’Py and still be fun.
The idea of coloring images in the real world is that you have one complete image on a piece of paper and you can simply pick up a pen and and start coloring as you wish. But doing that digitally is a whole different subject of course as we’re going into the realm of essentially making a digital drawing software which isn’t the easiest thing to do.
But for a fun little mini-game for a visual novel, it doesn’t need to be very complex and allow the player to draw with the mouse as they would with a pen with all the real world implications. As long as there’s a way to apply color to different sections of an image that will still be a fun little thing someone might want to do for their game.
In this post I will go over what my thought process was for it and some of the functionality behind the coloring image mini-game script I created, available over at Patreon. You can preview the final result in the video below! 😊
The script is available to download on my Patreon for anyone in the Voting-tier or higher: https://www.patreon.com/posts/114863360.
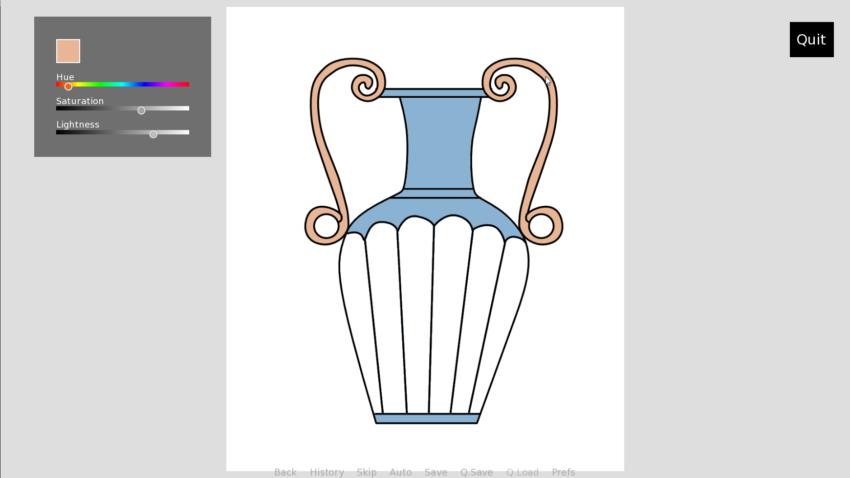
So I started experimenting with Ren’Py’s built in transform properties. One in particular, called matrixcolor, allows you to apply a color tint to an image by using a TintMatrix(). This is actually pretty perfect for a coloring page sort of mini-game, as the image is white to begin with. When then applying a tint of chosen color on white, that color should show up exactly on the image as the one you picked rather that if you applied the tint to another color, like for example, yellow. Black outlines are fine too and won’t be tinted since its black.
So when I had worked that out, it was just a matter of how to apply the color to different sections of an image. I realized, for simplicity, that I could divide an image into different parts and the overlay them on top of each other in the correct order. Then all you need to do is allow the player to select a color somehow and then click on the individual image itself to only color that. But to the player of course it looks like one complete image (as seen in the image at the top of the post).
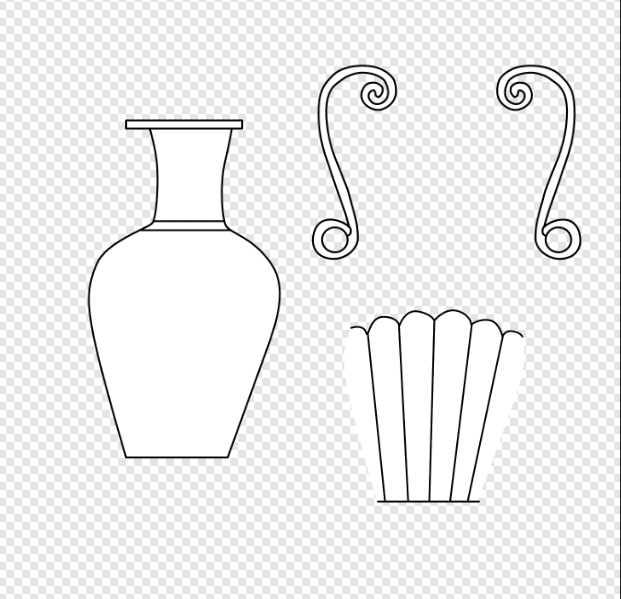
I made the below image of a vase as an example to work with for the mini-game script. Each part that should be able to hold it’s own color is a separate .png image.
The more challenging part I had to learn to do was making a color picker. I didn’t want to go the route of making individual clickable swatches and having the player being restricted to that (although not a bad idea) but rather allowing them to pick from HSL sliders to have more control.
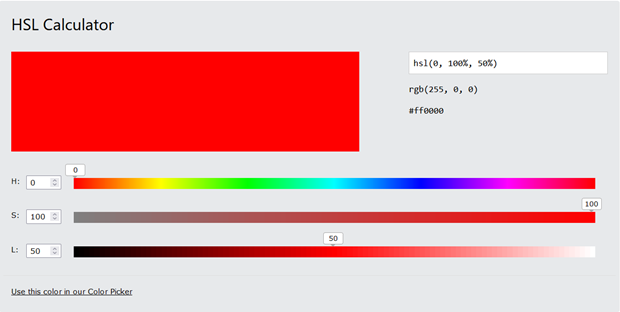
For that, I knew there was a Color() class in Ren’Py one could use and different methods that would allow me to make sliders for hue, saturation and lightness. My hope was that I could construct a hue gradient image via code using for example, a Solid() displayable. However I quickly learned Ren’Py has no functionality to create gradients, but only solid colors. So with great disappointment but determination to make it work somehow still, I decided to make individual 1 pixel wide Solid images, each with their own color, that when aligned next to each other, makes a gradient. This ended up with 300 individual Solid displayables for each bar. I could have made a separate gradient image in an external program too, but I opted for having control over it with code instead.
I was reluctant at first as I was thinking about how that might affect performance, but knowing that this is only a small mini-game and not a full-fledged drawing software, this shouldn’t be too bad knowing that it’s only quite small and simple colored images we’re talking about.
So I went ahead and coded the logic using loops that could create a hue gradient bar, saturation bar and lightness bar using the Color class, Solid displayables and standard Python.

Then I also needed to figure out how to make a slider handle for the user to be able to select values from the bars, so I went with invisible sliders where only the thumb would show, and overlayed them on top of the HSL bars.
There’s more to the scripts functionality of course, but this post outlines the base of how this script was formed. There’s more details over at the script post on my Patreon.
If you’re interested in downloading the complete script to have a look at it and/or use it in your Ren’Py games, it’s available on my Patreon along with many other fun mini-game scripts, and other fun and educational stuff I’ve made! You can check it out here: https://www.patreon.com/posts/114863360.
Thanks for reading and hope it was a interesting read!

Leave a Reply